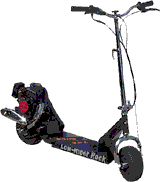
Razorback Gas Scooter Maintenance
How to Maintain your Gas Powered Scooter
Pocketbike tips, techniques and tools
Maintaining your new gasscooter is important. Some things should done every other time you fill the gas tank, other activities only need to be done annually. If you have purchased your gas scooter as a gift for your child, be sure he or she understands the importance of caring for their new vehicle. Providing proper maintenance is much cheaper than providing repairs. After you are finished reading our other maintenance specific pages (Razorback Maintenance Manual) check out our other two repair pages: Gas Scooter Drive Train Trouble Shooting and Diagnosing Gas Scooter Engine Problems
Still have questions? Write to us at info@gas-scooters-on-the-web.com .
Proper scooter maintenance is
crucial to getting the most out of your scooter. The following
instructions are for Neo Scooters City Rider and Razorback scooters.
However, most of the principals are universal and can be utilized on all
makes of scooters. Fuel and Oil mixture
To accomplish this you can buy 2 stroke oil at almost any auto parts
store or hardware store. The oil and gas are the mixed together in a
separate container before filling the scooter. The mixture should be
done at a 25:1 ratio (See ratio chart below). mixing the gas and oil too
lean can cause the engine to run too hot resulting in permanent engine
damage. Mixing the gas and oil too rich will cause decreased performance
and result in a fouled spark plug. By strictly following the 25:1
ratio you can be assured maximum performance from your scooter.
1 gallon of gas : 5 ounces of 2 stroke oil Spark Plug
Air Filter
Chain
Tires
You will notice that the valve on the 22.5cc front tire is turned to
the side a little and is not straight out. This is intentional to keep
the valve from hitting the frame of the scooter as the wheel turns. If
the valve is not angled you will hear a clicking sound every time the
tire makes a rotation. To cure this, let all of the air out of the tire.
Hold the tire with one hand and the rim with the other. Twist the tire
one way and the rim the other. This will cause the tire to
"slip" on the rim and make the valve turn to one side. Once
this is achieved refill the tire to 85psi.
Throttle Brakes
Carburetor
CHOKE
PRIMER
JET
IDLE
Please follow safe riding practices and ALWAYS wear protective gear.
Your scooter uses a 2 stroke engine for power. A two stroke engine was
chosen for it's excellent power to weight ratio. A two stroke engine
does not require that you ever change the oil, however it does require
that you mix a quality grade 2 stroke oil with the gasoline prior to
filling your scooters gas tank. This ensures that your engine will
remain lubricated and give you reliable service.
2 gallon of gas : 10.25 ounces of 2 stroke oil
3 gallon of gas : 15.5 ounces of 2 stroke oil
4 gallon of gas : 20.5 ounces of 2 stroke oil
5 gallon of gas : 25.5 ounces of 2 stroke oil


The chain on your scooter should be lubricated before every ride. The
chain should also be checked for tightness on a regular basis. If the
chain is too loose a popping sound can be heard and the scooter will
jerk under acceleration, or the chain will just jump off altogether.. If
the chain is too tight it will be noisy and bind, this can be felt by
pushing the scooter with the motor off.


When making any adjustments to the chain it is very important to ensure
the chain and sprockets are perfectly aligned. If they are not the chain
will most certainly come off. To properly align the chain you must get
your eye level with the chain. make sure that all components are aligned
before tightening the fasteners. Refer to the pictures above to see what
the chain should and shouldn't look like.


There are two main types of scooter throttles. One is a twist type, and
the other is a hand throttle. Although the throttles are different in
operation, they are essentially mechanically the same. When the rider
applies the throttle, a cable carries this motion down to the engine.
For continued smooth operation it is important to keep this cable clean
and free of obstructions.


The carburetor has many adjustments on it and it is recommended that
these adjustments be made by experienced persons only, however we will
point out the major points. The carburetor is responsible for pumping
the fuel and mixing it with the air at a precise measurement. The
carburetor does this with very small diaphragms, orifices and ports,
which are easily clogged by contaminants. This is why is is extremely
important that you use only clean new fuel in your gas scooter.

UP - CHOKE IS ON
DOWN - CHOKE IS OFF


We try to answer all your questions in the articles above. Still have a question? Write to us at info@gas-scooters-on-the-web.com and we'll answer it.
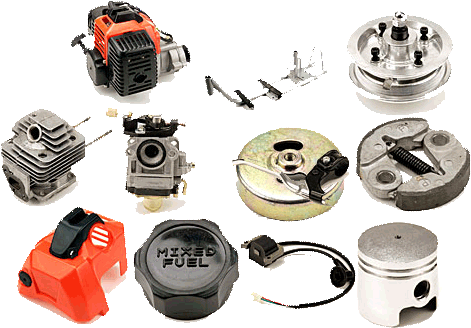
GOT GAS SCOOTER PARTS?
![]()
I get mine from Neo Scooters. What you see below are actual pictures from their parts catalog. No more guessing if you have the right part by an obscure description. They sort by the model of your scooter and have pictures of each part, with the price and part number. With Free Shipping Included, you cannot go wrong. Look for their parts link in the lower left corner of the page the link above on the Neo logo takes you to.
Not convinced that you need another newsletter?; Had you signed up earlier you would have been the first to know about Neo Scooters huge February sale. You would have heard about Rad Scooters buy one get one for half price Dirt Dog sale. You would have been the first to see the new Bladez Moby XL monster just released by Trendtimes.com.
And better yet, you would get these articles delivered directly to you. Sign up for our newsletter and have this online gas scooters content delivered directly to your mailbox. Feel free to .
Learn
| Brakes | Footdecks |
| Drives | Shocks |
| Engines | Tires |
| FAQ | Why Buy? |
Compare
Buy
Maintain
Troubleshoot
Site
3/8" 40 Piece Socket Set $5.99
3/8" 52 piece socket set $8.00

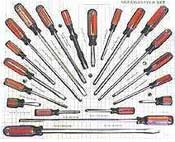 20
Piece Screwdriver Set $4.99
20
Piece Screwdriver Set $4.99
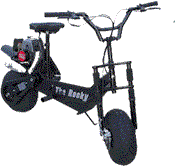
Get $75 Off Either of These Rock Scooters!
Click the images and follow the directions to sign up for a newsletter and take $75 off your order!
The "Rock" Lowrider
-41cc engine
-33 MPH
-F&B Drum Brakes
-Full 90 Day Warranty
$539.95
(before discount) -Free Shipping
The "Rock" Off-Roader
-41cc engine
-34 MPH
-F&B Disc Brakes
Full 90 Day Warranty
Only $799.95 (before discount) -Free Shipping
Click to subscribe to the motorized scooter list

Check Out These Great Helmets at Urban Scooters